Skip to content

Contents

  1. What is a micro spray irrigation system, and how does it work?
  2. Features of a micro-spray irrigation system
  3. Benefits of micro-spray systems for your garden irrigation
  4. Types of micro-sprays
  5. Checking the flow rate for your irrigation system
  6. Calculating flow rate
  7. Calculating the pressure of your micro spray irrigation system
  8. Planning your Micro Spray Irrigation System
  9. How to position micro sprays for your irrigation system
  10. Planning the pipe network for your Micro Sprays
  11. What components do you need to install a Micro Spray System?
  12. Micro-Spray System installation guide
  13. How long to run your micro-spray system for?
  14. Micro sprays system maintenance tips
  15. Final thoughts

What is a micro spray irrigation system, and how does it work?

Micro spray systems consist of a simple network of pipes with low-volume micro-sprays attached.

A micro-spray irrigation system consists of a simple network of pipes with low-volume micro-sprays attached. These micro-sprays have been designed to irrigate or water small to medium size planting areas. The low-volume sprays installed for landscape and horticultural applications deliver a fine water spray covering one to three metres. Sprays used for agricultural applications, such as watering under vines and orchards, have a larger spray radius. A micro-spray irrigation system can provide efficient and precise water delivery to targeted areas in your landscape, nursery or orchard.

A micro-spray irrigation system works using normal mains water pressure supplied to your property or by using a pump with a water source, such as a water butt or a well. The pressure pushes the water through the pipe network and then through the small openings of the spray heads attached to the pipe network. The result is a fine controlled spray providing your plants with just the right amount of water they need to thrive.

Features of micro-spray irrigation systems

A micro spray irrigation system typically features:

  • A water timer connected to a garden tap to automate the watering schedule.
  • A network of irrigation supply pipes to carry the water around the garden.
  • Spray heads to control the release of water to your planted areas.

Spray heads are usually mounted on stakes to elevate the sprays above plants and foliage. The type of spray head you choose to use will control how your plants are irrigated and how much water is delivered during each watering cycle. Later in this guide, we show a more detailed list of components to help you build your micro spray irrigation system.

Benefits of micro-spray irrigation systems for your garden

There are many benefits to choosing a micro spray irrigation system to keep your plants healthy. Below are some of the key benefits we want to share with you.

Evenly distributed watering

Advanced micro sprays provide even watering over planted areas with minimal wastage. The even distribution of water ensures no areas are overwatered or underwatered. When used with a water timer to accurately control the watering schedule, you save time by avoiding manually turning the system on and off. This also prevents accidental overwatering of your plants and crops.

Easy to install, maintain and repair

Micro sprays are the most straightforward systems to install for areas that have already been planted. They are quicker and easier to install than a drip irrigation system because you don't need to install as many emitters to cover the same area. Because this type of system uses fewer emitters, we will save money compared to a drip irrigation system. It also makes life easier for maintenance and repairs by having fewer emitters to deal with.

Minimal aesthetic disruption

Another benefit of using a micro-spray system is the minimal aesthetic disruption to your landscape. It is typical to install the supply pipes slightly underground and position sprays at the back of any border areas, thus meaning we don't have a clear view of them. With a water timer, we can even control a micro spray irrigation system to turn on overnight automatically, so we don't even see the system in operation.

Types of micro-sprays

There are many different micro sprays, from reliable micro jet irrigation systems to those with smaller micro sprinkler coverage. Read below for a list of the full range available and their uses to carefully ensure you pick the right style for your application.

Need help? Contact our team of experts who will be able to advise on the right system for your needs.

Microjet Sprays

Microjet Sprays

These are the most common micro sprays used in garden beds and borders. Microjet irrigation systems deliver a fine spray of water evenly over a maximum area of up to 3 metres radius. These are available in different spray patterns to suit different areas of your garden.

Key features:

  • 180° and 90° spray patterns are ideal for edges of paths and corners of garden beds.
  • 360° pattern provides general coverage of garden beds—ideal for placement in the centre of large garden beds and borders.
  • Strip Microjets are ideal for long narrow strips of beds and borders.
  • Misters are great to use in greenhouses and for hanging pots.

You can choose between fixed-flow microjet sprays, ideal for uniformly spaced garden beds. For odd-shaped garden beds, use an adjustable microjet spray (Vari-Jets) to allow for differing water patterns where required.

Shop for Microjet Sprays
Spectrum Sprays

Spectrum Sprays

Spectrum sprays are a full circle vortex sprayer that produces fine water droplets in a 360° spray pattern. Flow rate and coverage can be adjusted simply by twisting the cap. These are ideal for covering small to medium-sized areas. These micro spray heads have a high flow rate, quickly deliver large volumes of water to areas, and provide uniform coverage.

The ideal applications for using spectrums sprays include:

  • Pots, tubs and other large containers.
  • Ground cover, landscaped gardens and nurseries.

Elevate the spectrum spray head using a jet stake and riser for increased coverage. At ground level, the spectrum sprays have a throw diameter of up to 3-metres and 4-metres when elevated 50 cm.

Explore Spectrum Sprays
Downsprays

Downsprays

A downspray does what it sounds like; they spray downward, generally used in horticultural applications such as nurseries and tree lots for watering container-grown trees and shrubs.

They can also be used in the following applications:

  • Home and landscape to water small areas
  • Bedding plants in containers
  • Freshly planted trees and shrubs.

Downsprays have a spray jet that distributes water evenly and gently. These are used with a jet stake to elevate the spray jet above the surface. The gentle spray minimises damage to delicate plant foliage, and the 45° downspray reduces the effect of wind, minimising water wastage. These are particularly useful for trees and shrubs in pots and are commonly used in tree lots and nurseries.

Explore Downsprays

Checking flow rate for your irrigation system

When planning an irrigation system, you need to know how much water is available from your chosen water source. If you do not check this, you could design a system that releases more water than the water source can provide. This would result in a system that does not work.

Calculating flow rate

Calculating flow rate

Expressed in Litres Per Hour (LPH), you can easily measure your flow rate using only a bucket, a stopwatch and a calculator. Take a bucket (a 10-litre bucket is a good size) and then time how long it takes to fill it up. We can use the formula below to calculate the flow rate of the chosen water source.

(Volume of container ÷ Time to fill the container in seconds) x 3600 = Litres Per Hour (LPH)

Our experienced staff suggest taking this calculation and deducting 20%, to be on the side of caution when planning how much water we have available as there can be variance from one day to another.

Calculating the pressure of your micro spray irrigation system

Calculating the pressure of your micro spray irrigation system

We need to use a pressure gauge to measure your water source's water pressure. You can buy one from us here, or from reputable plumbing merchants and DIY stores. Attach the pressure gauge to the outlet of the water source, then gently open the tap. The pressure gauge will then give you a static water pressure reading.

Click here to rent a pressure gauge.

We need a minimum of 1.5 BAR pressure for the irrigation system to perform optimally. If you have water pressure exceeding 3 BAR, you will need to install a pressure reducer for optimum system performance. If you have less than 1 BAR pressure, your system will fail to operate correctly.

*If you are using a pump, refer to the technical notes indicating the pressure and flow of your pump.
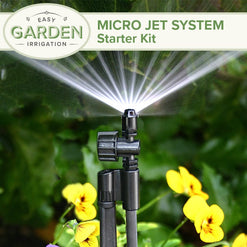
Planning your Micro Spray Irrigation System

Now that we understand what a micro-spray irrigation system is, the types available, what considerations we need to have, and how the system works, we can start to plan a bespoke micro-spray system for our garden.

Draw a Map of your Garden

It is best to draw a scale map of our garden to accurately determine where we want to position our micro sprays. Scaling your garden and mapping everything out allows you to experiment with placement, so you can make mistakes on paper before purchasing any equipment or doing any hard work.

Follow the steps below to create a map of your garden.

1. Draw a rough map of your garden

Using a blank sheet of paper, roughly draw out your garden. Start with the property boundary, then add paths, terraces and greenhouses. Then indicate the location of borders, flower beds, trees and shrubs. Make sure you mark the location of the water source, too.

2. Measure your garden accurately

Next, we can start to measure the garden accurately. Use the rough map we created previously to take notes. The more measurements you take, the easier the next step will be. It is also worth noting any obstacles at this stage.

3. Transfer the map of your garden to graph paper

Carefully transfer your measurements to a sheet of graph paper. Depending on the size of the area, use either a scale of 1:50, 1:100 or 1:200.

Indicate areas that are to be watered and which are not to be watered. Also, indicate any features and obstacles you previously noted.

Irrigation Planning Starter Guide

For more detailed instructions on how to accurately measure your garden, visit the Garden Irrigation Planning Guide.

Go to the irrigation planning starter guide

How to position micro sprays for your irrigation system

Below are specific recommendations for positioning each type of micro-spray we offer for landscape applications. Using the scale drawing you just created, we can accurately plot the best location for our sprays to be placed.

You will need the following:

  • The scale drawing of your garden
  • A ruler
  • An eraser
  • A compass

TOP TIP: Use a compass to draw the radius of the sprays. Mark the point of the compass on the drawing to determine the location of your micro-sprays.

How to position Microjet Sprays

The first thing to do is set the compass to the scale of 3 metres for your drawing. This represents the spray radius of the micro sprays (for 1:100 scale, this would be 2cm). Then proceed to draw either quarter-circles (90° microjets), semi-circles (180° microjets) or full-circles (360° microjets) to best cover your planted areas. You can reduce the radius if required, but remember that you will need to choose vari-flow microjets to reduce the spray radius when you come to install them. Overlap the spray patterns to avoid dry patches.

  • For edges of paths or placement along a wall or fence, use a 180° (half-circle) Microjet Spray. 180° microjets are the most common spray pattern used for planted areas less than 3 metres wide. We recommend an overlap of between 25%-50% to avoid dry patches.
  • For corners of garden beds, use the 90° (quarter-circle) Microjet Sprays to ensure we don't overspray onto walls, fences or paths. 90° Microjet Sprays are used in conjunction with 180° Microjet Sprays.

See the example below for Microjet positioning 90° and 180° Microjet Sprays.

  • For areas larger than 3 metres wide, we want to place 360° (full-circle) Microjet Sprays in the centre of the beds. Choose a Vari-Jet version to control the overall diameter of the spray. Full flow versions have a diameter of 8 metres.

See the example below for Micro Spray positioning using 360° Microjet Sprays.

  • We use the Strip Microjets for narrow beds and borders no more than 80cm wide. Overlap the Strip Microjets to avoid dry patches.

See the example below for Micro Spray positioning using Strip Microjet Sprays.

  • For delicate plants and close-in watering, use the Mister Microjets. If using outdoors, position close to the plant to be watered. These are also great to use in the greenhouse for general misting and watering delicate plants and seedlings.

How to position Spectrum Sprays

We recommend installing one Spectrum Spray in each of the tubs/containers that you wish to water. If the container is long and narrow, you may choose to place more to ensure even coverage—Mark your drawing where you plan to place the Spectrum Sprays for quick reference later.

For large areas of ground cover, we can use our compass to draw circles on the garden map to represent the coverage of the Spectrum Sprays. Set the radius of our compass to the scale of 1.5 metres to define the maximum spray radius (for a 1:100 scale, this would be 1.5cm). Draw full circles to cover the areas that you want to be watered. If required, you can reduce the radius, as the spectrum sprays are fully adjustable. You can also increase the radius to 2 metres using risers to elevate the spectrum sprays. It is good to have the circles overlapping by approximately 25%-50% to avoid dry patches.

See the example below for positioning Spectrum Sprays.

How to place Downsprays

You won't need to draw circles on your plan using a compass to determine how many downsprays you require. A good rule of thumb is to use one downspray for each plant you want to water. For a group of small plants closely planted together, you can use one downspray shared between them. Mark your drawing where you plan to place downsprays for quick reference later.

Planning the pipe network for your Micro Sprays

To accurately determine how much supply pipe we need for our irrigation system, we can draw a route the pipe will take from the water source to your irrigation system's endpoint(s) on the map we previously created.

With a scale map of your garden, draw a path from your water source past all the micro sprays you have planned. This path can branch off in different directions (using tee connectors) and do 90° turns around obstacles (using elbows). The idea of a watering system is to be hidden, so consider the best route for the pipework to follow to ensure it is out of sight. This could be underground (up to 5cm), under mulch, hidden behind bushes, or neatly pinned to a wall or fence.

The path we have drawn represents the main supply route. The pipe used for this is either a 13mm or 19mm Irrigation Supply Pipe, an LDPE pipe that is UV and weather protected, easy to cut to length and works in conjunction with 13mm or 19mm irrigation fittings, respectively. We can connect our micro sprays to this main supply pipe. All the components are available to buy separately, so you can easily customise your system's configuration. Later in the guide, we will discuss different configurations for different scenarios.

TOP TIP: If you need to run your pipe up and over a wall, or anything similar, consider planning for some extra elbow connectors to avoid kinking the pipe.

How many spray zones will you need?

As mentioned earlier in the guide, if you have a large garden to irrigate, you may need to create multiple zones if your water supply does not have a high enough flow rate to match the system you are designing. If this is the case, you will need to run multiple pipe lengths from your water source to the different zones you plan to create. As a rule of thumb, the experienced staff here at Easy Garden Irrigation recommend running no more than 15 sprays at a time when connected to a mains water supply (such as a garden tap).

What components do you need to install a Micro Spray System?

Now that we have created a map of the pipe and where we will position our sprays, we can start to build a shopping list of components required to install our irrigation system.

Below are three scenarios we want to create an irrigation system for, each with a shopping list of the parts needed to install.

Micro sprays for flowerbeds and borders

Scenario - We have a rear garden with flower beds around the edge of the garden with a width of 2m. The total length of the flower border is 20 metres (and 5 metres from the tap to the start of the flower border). We want to water the flower borders automatically every day. We draw a plan and determine that we will use 180° microjets at the back of the flower beds spaced 3 metres apart and 90° microjets used in the corners. A total of six 180° microjets are required, and two 90° microjets. After checking the flow rate of our water source, we know that we have plenty of water to supply the planned system.

From this information, we would build the following shopping list.

You will need:

  • Water Timer - Pick a water timer for automatic daily watering. Our favourite water timer in the office is the Claber Video 2 Plus, a digital programmer that allows a rain sensor to be connected (sold separately).
  • Nut and Tail Tap Adaptor - This connects the outlet of the water timer to the main supply pipe.
  • 25 Metres of 13mm Irrigation Supply Pipe - Irrigation supply pipe is the primary water carrier and will run past all the micro sprays we want to use in our irrigation system.
  • 13mm elbows, tee connectors, stop ends, etc. - Based on the plan's requirements, choose 13mm connectors to guide the pipe around the garden and terminate pipe runs.
  • Pipe Stakes and Wall Clips - Available for 19mm, 13mm and 4mm pipe, stakes and wall clips are used to secure the tube in place. Use the stakes to secure the pipe to soil or wall clips to secure the pipe to walls and fences.
  • Vari-Flow Spike Jets - These are pre-assembled to save on installation time. They feature a microjet spray head on top of a stake, a flow control valve to control spray radius, a short length of micro pipe already fitted and a tube adaptor. We choose six of the 180° versions and two of the 90° versions for our installation.
  • Irrigation Hole Punch - Used to pierce holes in the main supply pipe to connect the microtube of the micro sprays to the 13mm irrigation supply pipe.
  • Blanking Plugs – Also known as Goof Plugs, they are handy if we make any mistakes or change our minds after punching holes in the main supply pipe for our micro sprays to connect to.

Micro sprays for nurseries and tree lots

Scenario - We have a tree nursery with 30 trees in containers requiring regular watering. All the containers are grouped close together, and there is a tap close by that we can use for the water source. Based on the flow rate of the water source, we determined that we could only have 20 downsprays running at a time, so we decided to split the irrigation system into two zones. First, we want to run one line of the main supply pipe from the tap past 15 containers and another length of the main supply pipe running from the tap past the remaining 15 containers. We would require 30 metres of the main supply pipe (15 metres for each zone). We also want to shut off flow to individual containers when sold. We also want the watering to be automatic to save on labour.

From this information, we would build the following shopping list.

You will need:

  • Water Timer - The ideal timer for this project would be the Claber Dual Select, as it allows the irrigation system to be split into two zones with just one computer to control both lines.
  • 2x Nut and Tail Tap Adaptor - Connect each of the water timer's outlets to the main supply pipe used in our system. One for each outlet.
  • 30 Metres of 13mm Irrigation Supply Pipe - This is the primary carrier of water and runs past all containers we wish to provide water for.
  • 13mm Elbow, tee connectors, stop ends, etc. - Based on the plan's requirements, choose 13mm connectors to guide the pipe around the nursery and terminate runs.
  • Pipe Stakes and Wall Clips - Available for 19mm, 13mm and 4mm pipes, this secures the pipe in place. Use the stakes to secure the pipe to soil or wall clips to secure the pipe to walls, fences and posts.
  • Downspray Wire Stake with Shut-Off - These are pre-assembled to save installation time, with an extended length of micro pipe already fitted, a tube adaptor, and a shut-off clip to stop flow when a tree is removed.
  • Irrigation Hole Punch - Used to pierce holes in the main supply pipe to connect the microtube of the micro sprays to the 13mm irrigation supply pipe.
  • Blanking Plugs – Also known as Goof Plugs, they are handy if we make any mistakes or change our minds after punching our holes in the main supply pipe for our downsprays to connect to.

Micro Spray System installation guide

Now that we have everything planned, we have all the parts for our irrigation system delivered, and we're raring to go, we can start installing our micro-spray irrigation system.

During installation, you will need either a large pair of scissors, secateurs or a Stanley knife to cut the pipe, a hole punch to pierce holes in the main supply pipe, and a mallet/hammer to fix the pipe stakes and wall clips in place.

Make a connection to your water source

We start by screwing the water timer directly to the outlet of the garden tap. When we have installed the water timer, we can connect the main supply pipe to the outlet of the water timer using the nut and tail tap adaptor. If using a pressure reducer, we add this to the outlet of the water timer first, then attach the nut and tail tap adaptor.

How to set up your irrigation supply pipe

Lay the main supply pipe around the area to be watered. The tube will be more manageable if warmed in the sunshine before use. Initially, position it with weights until it relaxes.

Cut the main supply pipe using your cutting tool of choice and create the network using the required fittings (elbows, tee pieces, stop ends etc.) as per your plan. Ensure your cuts are clean and perpendicular to the pipe to ensure the best connection to your fittings.

TOP TIP: If you have difficulty inserting the fittings into the main supply pipe, dip the end of the supply pipe into hot (not boiling) water. We suggest carrying a thermos of hot water to warm the tube in.

Anchor and fix the supply pipe in place using pipe stakes and wall clips. The ideal placement of stakes and wall clips for the main supply pipe is one every 50-150cm.

The main supply pipe should ideally be laid within 20cm of the location of micro sprays if you have opted for the preassembled sprays on a stake with a short length of micro pipe. The longest length of micro supply pipe we want to use is 30cm.

TOP TIP: Flush through the main supply pipe. Do this by keeping ends open and running water through the pipe for 4-5 minutes. This will flush out any dirt and debris that may have entered the pipe during installation.

Connecting and installing the Micro Sprays

If you are using micro sprays on stakes, attach the micro-spray to the stake first, then position the stake in the ground as per your plan. Next, cut a length of micro pipe to reach from the main supply pipe to the inlet of the stake. We should aim to have a maximum of 30 cm of the micro tube to run from the main supply pipe to the micro spray.

TOP TIP: Position sprays placed along edges or in corners 2-5 cm from the edge to prevent overspray onto paths, fences and walls.

Connect the micro supply pipe to the main supply pipe by punching a hole in the main line with an irrigation hole punch and then inserting a tube adaptor into that hole. The tube adaptor creates an outlet for the micro supply pipe to connect to. Connect the other end of the micro supply pipe to the inlet of the micro spray stake.

If using pre-assembled micro sprays on stakes, the effort in the previous step has already been made for you. Use the hole punch to pierce the main supply pipe, insert the tube adaptor already connected to the micro pipe into that hole, and then position the stake to suit your requirements.

TOP TIP: If you pierce a hole in the wrong place, use a micro blanking plug (aka Goof Plug) to close and seal the hole.

It is also possible to insert the micro spray heads directly into the main supply pipe by simply punching a hole using the irrigation hole punch, and then inserting the inlet of the micro spray into the punched hole.

TOP TIP: Occasionally, slight leakage from the supply pipe/micro pipe connection point can occur. This usually seals over time. To prevent this, do not open the pierced hole too much and ensure the tube adaptor is correctly inserted at a 90° angle. If you are dissatisfied with a connection, you can plug it using a micro blanking plug and try again.

Finishing the installation

Everything should be connected and ready to test. Turn the system on, walk around to check for leaky joints, and check for sprays that aren't performing as expected, and all areas of your garden receive adequate water.

Once the system has been tested, you can start programming your water timer of choice. The following section in this guide are recommendations for programming your water timer.

How long to run your micro-spray system for?

When using your micro-spray system, you should remember that over-watering or underwatering can give your plants unnecessary stress. We advise you to research how much water your plants require to be healthy and thrive. Knowing this information lets you determine how long and how often you will need to run your micro-spray system.

Below is a rough guide to how long you should run your system throughout the year.

Spring Summer Autumn
15-20 mins, 3-4 times per week 20-30 mins, every day of the week 10-15 mins, 2-3 times per week

To find a run time that suits your garden watering needs, start by running your system two or three times a week for 10 minutes. After each watering cycle, check the water has penetrated the soil to a depth of at least 20 cm (8 inches) to encourage the best root growth. The soil should be damp but not saturated. If the soil is still dry, increase the run time by 3-5 minutes. Repeat this process until you find the ideal run time for your garden.

TOP TIP: Cover your garden beds and borders using mulch or bark to avoid water loss through evaporation. This is especially important during the Summer months when the sun is hottest.

Maintenance tips for Micro spray systems

Some essential maintenance is required to ensure your micro-spray system runs at peak performance.

  • Walk around your system now and then to check that each emitter is working correctly and does not need cleaning or replacing. Visually check that each micro spray is working as expected. If they are not performing as expected, you may need to flush the system and clean or replace the affected heads.
  • If a crafty critter chews through any of your supply pipes, or if you were a bit gung-ho with your garden spade, you will need to use a straight/joiner to repair the pipe. Using a good cutting tool, cut out the affected section, then use the joiner to re-join your supply pipe.

How to prevent water clogging

A filter can help prevent dirty water and debris from clogging your micro sprays. Keep the filter clean by rinsing in water once every couple of months to remove trapped dirt and debris.

Flushing the system regularly throughout the year ensures any trapped dirt or debris does not clog your spray heads. Do this by removing the stop ends from the main supply pipe and the micro-spray heads from the system. Flush each zone of your irrigation system for 4-5 minutes.

How to maintain your micro-spray system in winter

To make sure your micro-spray system is performing at its best year after year, we should take some steps before the winter months set in and any freezing conditions.

  • Water timers, filters, and pressure reducers are expensive items and are sensitive to freezing conditions, so take care of them. Remove them from the system and empty them of any water. The best way to empty these items is to hold them upside down and give them a good shake—store them in a dry place, preferably indoors (not in a shed).
  • Main Supply Pipes – A frequently asked question is, “Do I need to take the system in for the winter?”. The simple answer is no. You should, however, do your best to drain the system of excess water to prevent damage from freezing water. Remove all the stop ends in your system and any other connectors at low points that can help drain the excess water system.

TOP TIP: To prevent any creepy crawlies from getting inside your system and causing a blockage, replace the connectors after draining the water. It is also good to flush the system after the winter months if they still manage to find their way in.

Final thoughts

We hope this guide is helpful to you, with some useful tips and tricks to manage your micro spray system in your garden. For more garden irrigation tips and advice, you can explore our other helpful irrigation resources below:

Want to explore more?

Browse our entire micro-sprays collection. You can also explore our garden irrigation kits. Otherwise, discover some of our best-selling products below.

Discover Micro Spray Irrigation Systems

Just ask, we're really friendly

If you need to ask us a question about anything, you can reach us either by calling our sales line, or by dropping us an email.